Carpet cleaning doesn’t have to mean waiting for professionals or dealing with stubborn stains for months. The right carpet cleaner, and knowing how to use it properly, can refresh your floors in a weekend. Whether you’re tackling pet accidents, deep dirt buildup, or just giving your carpets seasonal maintenance, a home carpet cleaner delivers results comparable to professional services at a fraction of the cost. This guide walks you through selecting the right machine, preparing your space, operating it correctly, and handling tough stains like someone who knows the job inside out.
Table of Contents
ToggleKey Takeaways
- Using a carpet cleaner at home delivers professional-quality results at a fraction of the cost by selecting the right machine type—upright for large areas, portable for spots, or rental units for whole-house deep cleaning.
- Thorough preparation, including vacuuming twice and pre-treating stains 10–15 minutes before machine cleaning, directly improves effectiveness and can reduce drying time by up to 30%.
- Master the cleaning technique by making overlapping 2–3 foot passes with gentle downward pressure, working backward and forward over each strip, and finishing with a water-only dry pass to extract maximum moisture.
- Match your carpet cleaner to your carpet type—high-pile and wool require gentler agitation and lower heat, while low-pile synthetics handle aggressive cleaning to avoid fiber damage and warranty voids.
- Identify stain types to apply the right solution: enzyme-based cleaners for organic matter, degreasers for oil, enzymatic treatments for pet accidents, and hydrogen peroxide for tannins, allowing proper dwell time before machine cleaning.
- Prevent stain reappearance by performing a final rinse pass with clean water only after treatment, and always verify results when the carpet is completely dry to catch any residual soap or cleaner.
Choosing the Right Carpet Cleaner for Your Home
Not all carpet cleaners are created equal. Before you rent or buy, understand what you’re dealing with.
Understanding Different Carpet Cleaner Types
There are three main categories: upright machines, portable/spot cleaners, and deep-cleaning rentals.
Upright cleaners look like vacuum cleaners and are best for large areas. They hold more water, heat it more consistently, and cover ground faster than portable units. Brands range from budget models under $200 to mid-range options ($300–$600) that last several years with proper maintenance.
Portable spot cleaners are lighter, cheaper ($150–$400), and work well for stairs, upholstery, and targeted stains. The trade-off is smaller tanks and less muscle for deeply embedded dirt. They’re ideal for renters or homeowners with small carpet areas.
Rental units (from hardware stores or equipment rental shops) are heavy-duty machines designed for whole-house deep cleaning. They cost $40–$80 per day but deliver extraction power that rivals professional services. Rentals make sense if you’re cleaning multiple rooms or dealing with serious neglect.
Consider your carpet pile type as well. High-pile or wool carpets need gentler agitation and lower heat: low-pile synthetic blends can handle more aggressive cleaning. Check your carpet label or manufacturer specs, using the wrong approach damages fibers and voids warranties. Real-world testing shows that matching the machine to your carpet type reduces drying time by 30% and improves longevity.
Preparing Your Carpet Before Cleaning
This step separates good results from great ones. Most DIYers underestimate prep work, but it directly affects cleaning effectiveness.
Start by removing furniture and loose items from the room. You don’t need to empty everything, but anything on the carpet itself should go. Use furniture sliders or plywood sheets to protect hardwood floors if you’re moving pieces around.
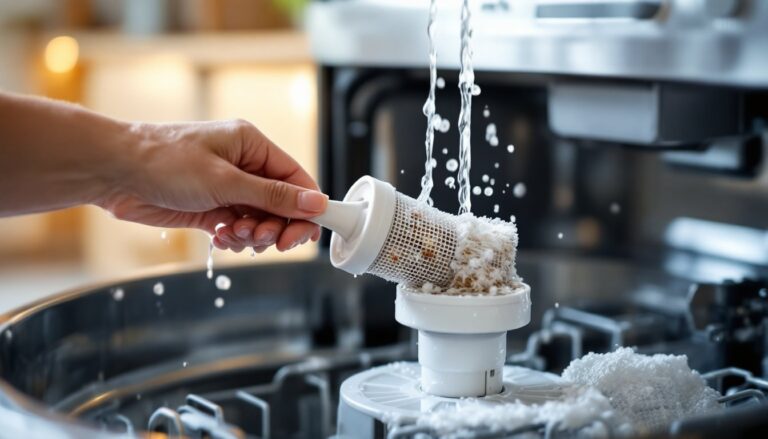
Next, vacuum thoroughly, this cannot be skipped. Loose dirt and pet hair clog the cleaner’s brushes and reduce water extraction efficiency. Run your vacuum over the entire carpet twice, using slow, deliberate passes. Pay extra attention to baseboards where dust accumulates.
Address spills and stains before machine cleaning. For fresh spills, blot (don’t rub) with a dry towel or paper towels. For older stains, spray with a pre-treatment solution 10–15 minutes before cleaning. Popular options include commercial pre-spray or a DIY mix of equal parts white vinegar and water. Let it sit to break down the stain chemistry.
Check your carpet for colorfastness if it’s older or vintage. Test a small, hidden area (like under a couch) with your cleaning solution first. Synthetic carpets are generally colorfast, but natural fibers like wool can bleed dyes if over-saturated. If discoloration appears, dilute your cleaning solution further or skip heavy pre-treatment on that area.
Finally, ensure good ventilation. Open windows and doors, turn on ceiling fans, and consider running a dehumidifier if you live in a humid climate. Damp carpets left in still air develop musty odors and mildew, which defeats the entire purpose of cleaning.
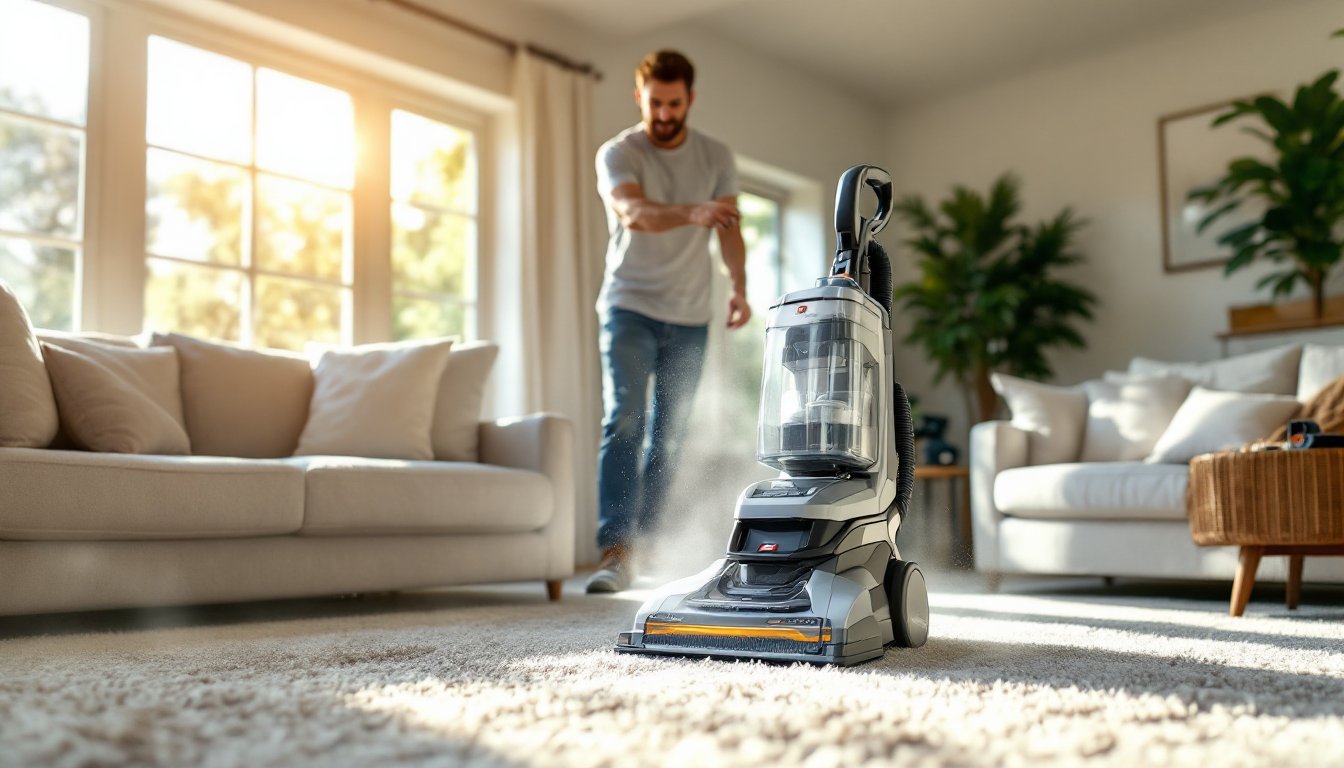
Operating Your Carpet Cleaner: The Basic Process
Using a carpet cleaner correctly is straightforward once you understand the machine’s anatomy and rhythm.
Filling, Heating, and Starting Your Machine
Most machines have two tanks: a clean-water tank (holds mixed solution) and a recovery tank (collects dirty water). Consult your manual for exact capacities, upright machines typically hold 1–2 gallons of clean water and 1.5 gallons of recovery capacity.
Fill the clean-water tank with hot tap water (not boiling: around 140°F is standard). Add the recommended amount of carpet cleaning solution, never assume “more is better.” Excessive detergent leaves residue, causes resoiling, and creates sticky buildup. Most solutions call for a capful per gallon: follow your product’s label.
Turn on the machine and let it heat for 30 seconds to a minute. This warming cycle activates the cleaning agents and improves extraction. Some machines have a “heat ready” indicator light: wait for it before proceeding. Using a comprehensive guide on how to clean a carpet at home can provide additional technical details specific to your machine model.
Mastering the Cleaning Technique and Passes
Start in a corner or the farthest point from your exit. You’re working toward the door so you don’t walk over just-cleaned areas.
Hold the handle at a slight angle and engage the brush or agitator with a gentle downward pressure. Begin with a slow, deliberate forward pass over a 2–3 foot strip, keeping the nozzle slightly overlapped. Then pull backward over the same area. Most machines require 2–3 passes per strip: first pass (brush and inject), second pass (gentle brush), third pass (extraction-focused, lighter pressure, moving faster to pull water out).
Move forward 1–2 feet and repeat. Consistent, overlapping passes are more important than speed. Rushing leads to missed patches and uneven cleaning. Walk at the machine’s natural pace, forcing it damages the motor and reduces solution flow.
Never keep the machine in one spot for more than a second or two. Stationary operation floods the carpet and delays drying. Your goal is to inject solution, agitate fibers, then extract as much water as possible in each pass.
When you reach the end of a room, make one final dry pass, engage the motor but skip the solution spray. This pulls remaining water out, accelerating drying time significantly. A final dry pass can reduce drying from 24+ hours to 4–8 hours.
Tackling Stubborn Stains and Problem Areas
Heavy stains need strategy. Using the carpet cleaner alone won’t always cut it.
Identify the stain type first. Food, dirt, and organic matter respond to enzyme-based cleaners. Grease and oil need degreasers or specific oil-removal solutions. Pet stains (urine, vomit) require enzymatic treatments that break down proteins and odor-causing compounds. Tannins from tea, coffee, or wine call for oxidizing cleaners or hydrogen peroxide-based solutions.
For set-in stains, apply a targeted pre-treatment and let it dwell for 15–30 minutes before machine cleaning. This gives the chemical time to penetrate and break down the stain. Afterward, use your carpet cleaner with normal technique. Expect to make more passes over stubborn areas, some stains need 4–5 passes to fully lift.
For pet accidents, spray the area with an enzymatic cleaner rated for pet stains. These break down urine crystals that cause odors and resoiling. Let it sit overnight if the accident is older than a few days. Then machine clean with hot water and a neutral detergent. If odor persists after drying, repeat: enzymatic cleaners require moisture to work effectively, so a damp post-cleaning application followed by air drying often finishes the job.
High-traffic areas accumulate compacted dirt and oils that look darker than surrounding carpet. Multiple machine passes help, but pre-treatment is key. Apply a high-alkaline (pH 10+) pre-spray to these zones and let it work for 10 minutes before cleaning. Avoid over-saturating to prevent browning, a common result of too much solution in heavy-soiled areas.
For water-soluble stains (salt rings, residue from evaporated spills), a light spray of distilled water before machine cleaning helps rehydrate and lift them. This simple trick prevents those stubborn white halos that refuse to budge with detergent alone.
After tackling stains, always check by touching the area when dry. Stains sometimes reappear as water evaporates if residual soap or cleaner remains. If this happens, do a final machine pass with clean water only, no solution, to rinse thoroughly.