A KitchenAid stand mixer is one of the most durable kitchen investments a home baker or cook can make, but like any workhorse appliance, it needs proper care and occasional part replacement. Whether you’re a seasoned baker going through a third dough hook or a new mixer owner discovering what each attachment does, understanding your mixer’s parts and maintenance is key to getting years of reliable performance. This guide walks you through the essential components, common replacements, and how to keep your mixer running smoothly without unnecessary downtime or guesswork.
Table of Contents
ToggleKey Takeaways
- KitchenAid stand mixer parts like the flat paddle, dough hook, and wire whip are replaceable and affordable, typically costing $15–$60 each, making DIY maintenance a cost-effective investment.
- Monitor your mixer for warning signs including mixing consistency changes, unusual grinding or squeaking sounds, and loose bowls to catch wear early and prevent frustrating mid-recipe failures.
- Replace attachments when you notice visible cracks, splinters, or a flattened spiral on the dough hook, which directly impacts kneading quality and mixing performance.
- Immediate cleaning after use, proper storage in a dry location, and avoiding overloading extend your mixer’s lifespan and prevent premature wear on internal components.
- Perform an annual inspection of your KitchenAid stand mixer parts—checking attachments for damage, bowl lock security, and listening for unusual sounds—to catch issues before they become costly repairs.
Understanding Your KitchenAid Stand Mixer’s Essential Components
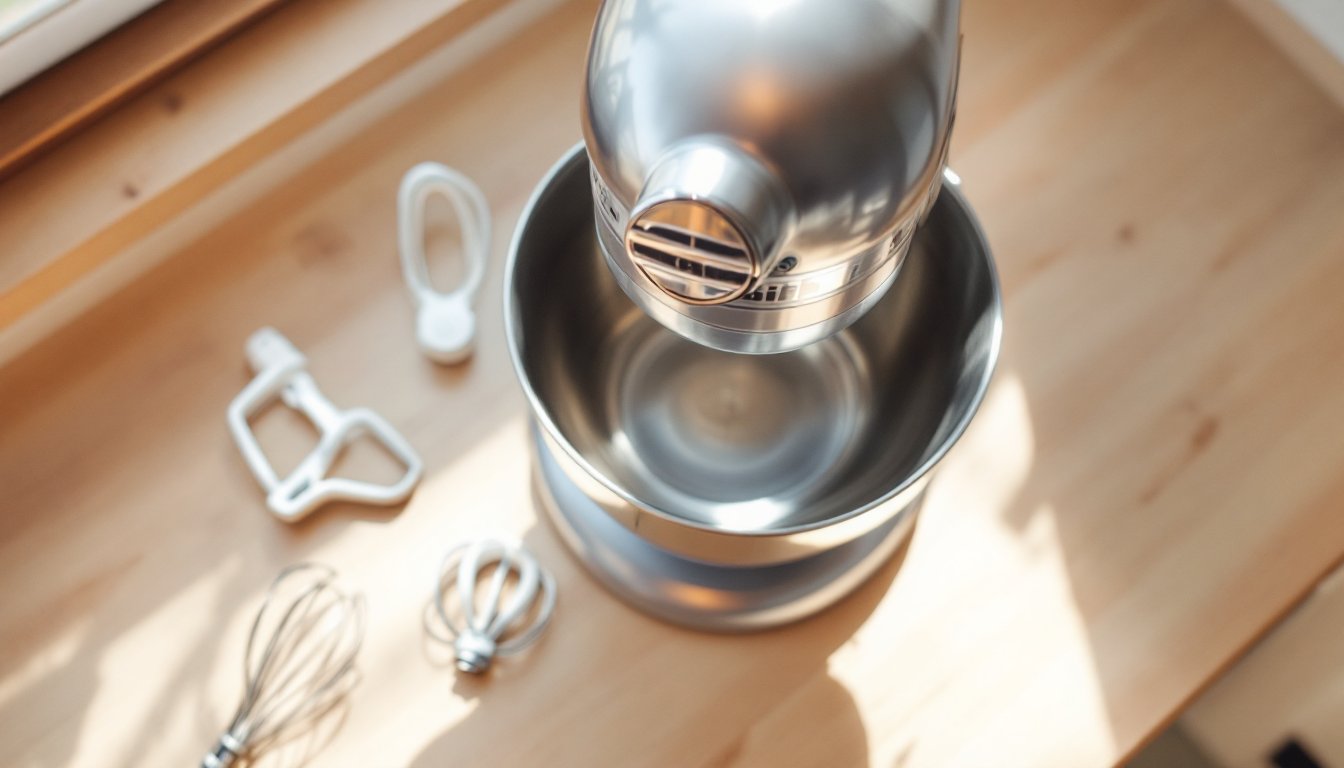
Your stand mixer consists of several core parts working together. The mixer head sits atop the base and houses the motor and gear system. The mixing bowl (typically 5-quart capacity in the classic model) sits on the base and rotates during mixing. The shaft, a hollow post, extends from the head and attaches the mixing attachments.
Inside the head, the transmission transfers power from the motor to the shaft, while a worm gear helps control speed and torque. The motor itself is sealed and rarely needs replacement if the mixer is used and stored correctly.
Most owners only interact with the removable parts: the bowl, the three primary mixing attachments, and occasionally the bowl-lift latch or mixing bowl guard. Understanding these parts helps you troubleshoot issues and know when a replacement is genuinely needed versus when the appliance just needs a reset or cleaning.
Common Mixer Attachments and When to Replace Them
Your KitchenAid mixer comes with three main attachments, each designed for specific tasks. Knowing when to swap them out saves time and produces better results.
Flat Mixing Paddle, Dough Hook, and Wire Whip
The flat mixing paddle (also called the flat beater) is your go-to for general mixing, cookies, cakes, brownies, and mashed potatoes. It scrapes the bowl sides as it mixes, creating an even blend. Over time, the paddle’s edges can crack or splinter from repeated impacts or excessive heat exposure. If you notice chunks missing or the rubber coating peeling, replacement is due.
The dough hook handles heavier, stiffer doughs like bread and pizza dough. It spirals and kneads rather than beats. Dough hooks wear through friction and occasional over-torquing. A worn hook produces uneven kneading and requires longer mixing times. Replace it when the spiral flattens noticeably or cracks appear.
The wire whip whips air into eggs, cream, and egg whites for meringues and whipped toppings. It’s the most delicate of the three and can bend or lose wires from impact or improper storage. A damaged whip creates clumps instead of stiff peaks, so inspect it before every use.
All three attach and detach by hand, just push the locking collar on the shaft upward and twist. Genuine KitchenAid replacements are widely available, and many experienced bakers keep a backup set on hand. Third-party attachments exist but vary in quality: genuine parts ensure proper fit and performance.
Identifying Worn or Damaged Parts
Catching wear early prevents frustrating mid-recipe failures. Listen and look for these warning signs.
Mixing consistency changes. If your dough suddenly feels overworked or grainy, or if whipped cream refuses to stiffen, suspect a worn attachment. The shape and surface finish of each piece directly affect how it interacts with ingredients.
Unusual noise during operation. A grinding or squeaking sound often points to gear wear or friction in the transmission. A clicking noise typically means the attachment isn’t seated properly on the shaft or the shaft collar is loose. Stop the mixer immediately and check the assembly.
Visible cracks, splinters, or corrosion. Stainless steel bowls rarely corrode, but aluminum bowls can develop oxidation if exposed to acidic foods left sitting overnight. Cracks in plastic components mean replacement time. Don’t ignore small splinters on attachments, they can shed into food.
Bowl not rotating smoothly or locking properly. If the bowl tilts, wobbles, or requires excessive force to lock, the bowl-lift mechanism or the locking tabs on the bowl itself may be damaged. A loose bowl is a safety hazard and produces uneven mixing.
Leaking or pooling oil around the head. The transmission is sealed, but seals can wear. Minor weeping is normal: steady dripping means the seal may need replacement by a technician. Don’t attempt this yourself unless you’re experienced with appliance repair.
How to Source and Replace KitchenAid Mixer Parts
KitchenAid parts are straightforward to source and replace yourself, saving time and money versus professional service.
Where to buy. The official KitchenAid website, Amazon, Williams-Sonoma, and dedicated appliance parts retailers all stock replacement attachments, bowls, and wear items. Identify your mixer model (printed on the base) before ordering, KitchenAid makes several sizes, and while many parts are cross-compatible, some are model-specific.
Installation is simple. Most replacements require no tools. To swap attachments, raise the mixer head by pulling the latch beneath the head unit, remove the old attachment by rotating it counterclockwise, then snap the new one on and twist clockwise until it’s snug. To replace the bowl, tilt the head down, unlatch the bowl, and pull it straight out. New bowls snap in with an audible click.
Troubleshooting before replacement. Before buying a new part, try removing and reseating the attachment or bowl. A strand of dough or a hair wrapped around the shaft can cause the mixer to stall or run noisily. Dry the parts thoroughly after washing, moisture in the shaft recess can create friction. Kitchen design ideas, small often include mixer maintenance tips worth exploring.
Cost expectations. Replacement attachments run $15–$35 each. Bowls cost $30–$60, depending on capacity and material. Specialty attachments like grain mills or pasta presses cost more but expand the mixer’s functionality significantly. For guidance on choosing the right attachments, expert tests of KitchenAid stand mixer attachments can help you decide what’s worth the investment.
Maintaining Your Mixer for Longevity and Performance
Proper maintenance extends the life of your mixer and keeps parts from wearing prematurely.
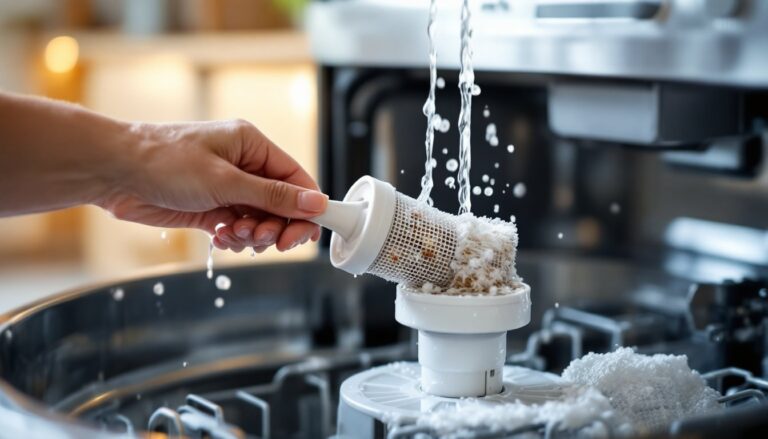
Clean immediately after use. Dried dough, batter, and egg white are tough to remove and can corrode or gunk up the shaft. Wash attachments and the bowl with warm soapy water and dry completely before storing. The mixer head itself needs only a damp cloth, never submerge it. Don’t put attachments in the dishwasher unless the manual explicitly allows it: hand washing is gentler.
Store wisely. Keep the mixer on a stable, flat surface away from moisture and direct sunlight. Store attachments in a dry drawer or cabinet. Don’t hang them on hooks, the weight and leverage can bend them over time. If you store the mixer under a cabinet, ensure the head clearance when raised.
Don’t overload. Each mixer size has a capacity limit. The 5-quart classic model handles roughly 4 pounds of bread dough or 6 cups of cake batter at maximum. Overloading stalls the motor and stresses the transmission. Respect the posted limits.
Avoid prolonged high-speed mixing. Mixing at speed 8 for 5 minutes is fine: mixing at speed 8 for 15 minutes risks overheating the motor and wearing the transmission faster. Knead dough for the recommended time and then stop. Home maintenance checklists and seasonal repair guides include appliance-care principles that apply to stand mixers too.
Annual check-up. Once a year, inspect attachments for cracks, check that the bowl locks securely, and listen for unusual sounds during a test run with an empty bowl. Catching issues early costs less than ignoring them until the mixer fails.
Conclusion
KitchenAid stand mixers reward owners who understand their parts and maintain them consistently. Most replacements are DIY jobs that take minutes and cost less than a fancy dinner out. By learning to spot wear, knowing where to source genuine parts, and keeping up with simple cleaning and storage routines, you’ll get decades of reliable service from your mixer. It’s one of those kitchen appliances that truly pays for itself over time.