A GE dishwasher leaking from the bottom of the door is more common than you’d think, and the good news is that most causes are fixable without calling a technician. Water pooling on your kitchen floor after a wash cycle signals that something’s gone wrong with the seal, drain, or internal components, but before you panic, know that many homeowners handle this repair themselves in under an hour. Whether it’s a worn gasket, a clogged drain filter, or a misaligned spray arm, we’ll walk you through the diagnosis and fix. This guide covers everything from visual inspection to a complete door gasket replacement, so you can get your dishwasher running leak-free again.
Table of Contents
ToggleKey Takeaways
- A GE dishwasher leaking from the bottom of the door is usually caused by a worn door gasket or clogged drain filter, both of which are fixable without professional help.
- Inspect the door gasket for cracks, flattening, or peeling by running your finger along the rubber seal—visible water stains and discoloration indicate the gasket is degraded.
- Clean the drain filter and spray arm first by rinsing them under warm water and using a toothbrush or paperclip to clear mineral deposits and food debris, as this is the quickest and least expensive fix.
- If cleaning doesn’t stop the leak, replace the door gasket by gently prying out the old seal, cleaning the channel, and fitting in a model-specific replacement gasket in 20–30 minutes with no special tools.
- Hard water deposits and mineral scale commonly clog drain components, so using rinse aid and rinsing plates before loading can prevent future GE dishwasher leaks from drainage issues.
Why Your GE Dishwasher Is Leaking From The Bottom Of The Door
When water escapes from the bottom of your dishwasher door, the culprit is usually one of two things: a faulty door seal or a drainage problem inside the tub. Understanding which one you’re dealing with will save you time and frustration.
The door gasket (or seal) is a rubber strip that runs around the inside edge of the door frame and creates a watertight barrier when the door closes. Over time, heat, detergent, and wear can degrade this rubber, creating gaps where water leaks out. A clogged drain filter or spray arm, on the other hand, causes water to back up inside the tub and eventually escape at the lowest point, which is often the door seal area.
Worn Or Damaged Door Gasket
The door gasket takes a beating. Every wash cycle exposes it to hot water, steam, and sometimes abrasive detergent residue. After a few years (or if your dishwasher runs frequently), the rubber becomes brittle, cracked, or flattened, losing its grip and allowing water to seep past. You might also notice water leaking only when the dishwasher runs, not when it’s sitting idle.
If you’ve recently used a corrosive cleaner or run the “sanitize” cycle on high heat regularly, you’ve probably accelerated gasket wear. Even minor cracks or peeling edges can be enough to compromise the seal.
Clogged Drain Filter Or Spray Arm
Food debris, soap film, and mineral buildup can clog the drain filter or block the spray arm holes, causing water to pool at the bottom of the tub instead of draining out. When water can’t drain, pressure builds and finds the path of least resistance, straight through the door seal. This is especially common if you’re not rinsing plates before loading or if you live in a hard-water area and skip rinse aid.
How To Inspect The Door Seal For Damage
Before you order a replacement gasket, inspect the existing one to confirm it’s the culprit. Pull out the bottom rack and open the door fully, then run your finger along the rubber gasket on the inside edge of the door frame. Feel for cracks, hardened spots, flattening, or visible peeling. If the gasket feels sticky or has a strong detergent smell, it’s degraded.
Look for visible water stains or discoloration on the gasket itself, these indicate repeated water exposure past the seal. Shine a flashlight into the corners where the gasket meets the frame, as tears often hide there. Check that the door closes evenly and doesn’t sit loose or off-center: a misaligned door can also prevent the gasket from sealing properly.
If the gasket looks intact but you’re still leaking, the problem is likely internal drainage. Common solutions come from resources that explain dishwasher leaking from the bottom, which often point to clogged filters or spray arms as frequent culprits. Don’t assume you need a new gasket yet, move on to the drain filter inspection before ordering parts.
Steps To Clean The Drain Filter And Spray Arm
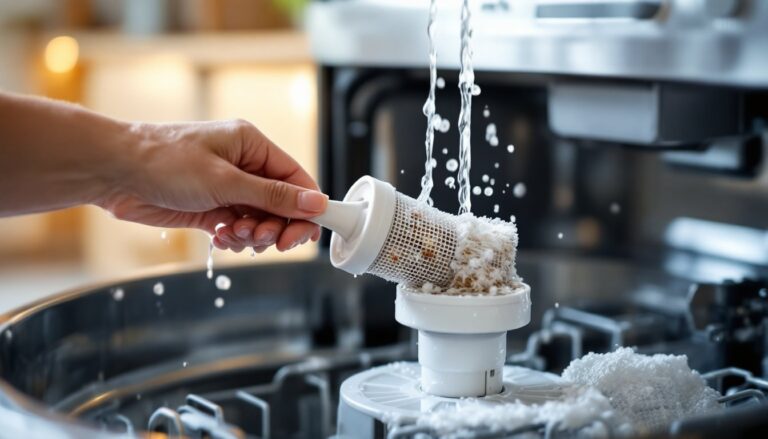
Cleaning the drain filter is the quickest fix and costs nothing. Start by running an empty cycle on your GE dishwasher to clear any loose debris, then turn it off and unplug it from the outlet. Pull out the bottom rack to access the filter, which is usually a cylindrical or basket-style component near the back or bottom center of the tub.
Twist the filter counterclockwise to remove it (some GE models have a release button instead). Rinse it under warm running water, using an old toothbrush to scrub away buildup, especially around the screen mesh. Look for hard deposits, these are mineral scale from hard water, and soak the filter in equal parts white vinegar and water for 15–30 minutes if buildup is stubborn.
While the filter soaks, check the spray arm (the rotating part above the bottom rack). Pull it straight down or unscrew it, depending on your model. Rinse it thoroughly and use a straightened paperclip or a small bottle brush to clear any holes that look blocked. Even one clogged hole can reduce water circulation and lead to pooling.
Reinsertion is the reverse: twist the filter back in clockwise until it seats, then reinstall the spray arm. Run a full cycle and watch for leaks. If water still escapes from the bottom door area after cleaning, the gasket is likely your issue. For detailed guidance on this process, many homeowners reference home improvement resource guides for step-by-step photo tutorials specific to their model.
How To Replace The Door Gasket
If inspection and drain cleaning didn’t solve the leak, the door gasket needs replacement. The good news: this is a straightforward job that takes 20–30 minutes and requires no special tools.
Unplug the dishwasher or flip the circuit breaker to cut power. Open the door fully and locate the gasket, which runs around the inner edge of the door frame in a rubber channel or groove. Depending on your GE model, the gasket may be held by clips, screws, or adhesive, or it may simply pull out of a retaining channel.
Gently pry the old gasket free using a plastic putty knife or a non-marring tool, metal can damage the frame. Work slowly from one corner, easing it out of its channel or unclipping it as you go. Once fully removed, clean the channel thoroughly with a damp cloth to remove old adhesive, soap residue, or mineral deposits. Let it dry completely.
Purchase a replacement gasket kit specific to your GE model (search your model number online to find the exact part). These kits typically include the new gasket and any necessary hardware. Fit the new gasket into the channel, starting at one corner and working around the frame. Make sure it sits evenly and isn’t twisted. If your gasket uses clips, push them in place: if it’s adhesive-backed, press firmly as you go, holding pressure for a few seconds in each section.
Close the door gently to test alignment and ensure the gasket compresses evenly all the way around. Plug the dishwasher back in and run a short test cycle. Place a towel under the door and watch for leaks during the first few minutes of operation.
Tools And Materials You’ll Need
- Replacement door gasket kit (GE model-specific)
- Plastic putty knife or non-marring tool
- Damp cloth for cleaning
- Flathead screwdriver (if your model uses clips)
- Flashlight (for inspecting)
- Towels (for testing and cleanup)
No special power tools are needed. If your model has a stuck or severely corroded gasket, a heat gun on low setting can soften old adhesive, but use caution to avoid warping plastic components. Many homeowners also consult expert home improvement guides for model-specific walkthroughs before ordering parts, which can save time and ensure you’re buying the right component.